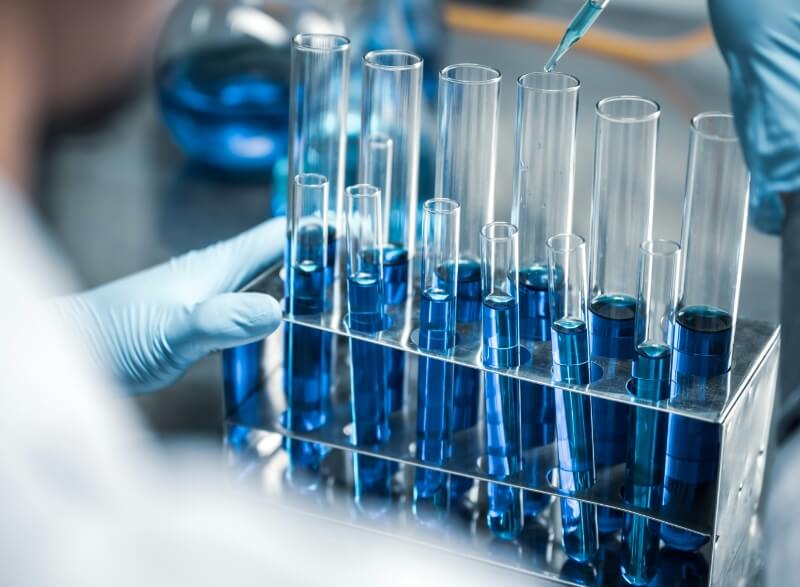
Chemistry Lockers

The Chemistry Department provides lockers with a variety of supplies at no cost to our students. You will find the majority of the equipment needed for your labs in these lockers. If your lab requires equipment not found in your lockers, you will often find these set out for you or in one of the labeled drawers around the perimeter of the lab room. If you cannot find the equipment needed for your lab, you may borrow one from the Chemistry Stockroom. 

At the beginning of each semester, you and your partner(s) will be assigned lockers. You are responsible for the equipment in your lockers. It is in your best interest to immediately report lost or broken equipment. This ensures that you will receive a replacement in time to complete your lab. Please note that you may be sharing your lockers with other groups from other sections. It is extremely important to return all equipment back to your lockers clean and dry. Failure to do so could result in exposing other students to hazardous chemicals and could result in disciplinary actions at the discretion of your instructor. 

Below is an example of the contract you will sign at the beginning of the semester and a list of the equipment provided. You will have an opportunity to review the contract and to inspect the contents of your lockers on the first day of lab. It is important to familiarize yourself with the equipment since you will be using them regularly in the lab. This is also your opportunity to choose your lab partners. Partners are assigned simply by who you are sitting next to. You can have up to two partners.

Chemistry Locker Contract Example

Your group will have a drawer that can be locked with a combination number padlock. Your instructor will not have access to these numbers so it is important to remember or write down your number somewhere for you to reference. Failure to remember your number could result in you not having access to your equipment in the lab. If you do not remember your number, contact one of the lab technicians for assistance.

At the end of the semester, you will need to check in your equipment to the stockroom. To expedite this process, keep your equipment clean throughout the semester. Leaving it to the last minute will make cleaning the equipment that much harder. Failure to check-in your lockers may result in disciplinary actions.

Keeping your equipment and work area clean is a part of your contract. It is good lab practice to clean before you leave the lab and you will be expected to do so. You do not want residual chemicals in your equipment interfering with your experiments. Also, remember that you are not the only one using the lab. Clean up after yourself to avoid exposing others to hazardous chemicals.

In the chemistry labs, you will be using chemicals you normally will not have access to so the cleaning process is different than doing dishes at home. It is important to follow all instructions for proper waste disposal before attempting to clean your equipment or workspace. Unless authorized to do so, no chemicals from the lab may be washed down the drain or disposed of in the trash. Chemicals poured down the drain gets released into the environment and could have severe consequences. Chemicals thrown in the trash gets sent to the landfill and they can leach underground into our water sources. If in doubt, contact your instructor or lab technicians for advice.

In order to clean your glassware, here is a quick step-by-step process you can follow. Please note that there will be times where you will be provided with equipment not included in your lockers. Please make sure to clean these as well and return them where you found them. Equipment not in your lockers is meant to be shared with everyone. Hoarding them in your lockers will result in a lack of equipment for the following labs.

  1. If there are chemicals in your glassware, dispose of them properly as hazardous waste in the appropriate waste container as specified by your instructor, lab technician, or as indicated in your lab procedures.

  2. If you do not know what the chemical is, contact your instructor or lab technician before proceeding. Provide them with as much information as you can to help them identify the mystery chemical.

  3. Rinse the glassware up to three times with a small amount of solvent into the appropriate hazardous waste container. These rinses must not go into the drain since they will still contain the chemicals. Use a solvent appropriate for the chemical you are disposing of. For example, use water for non-water reactive and water-soluble/miscible chemicals. Use acetone for organic chemicals.

  4. Now that the hazardous chemical has been removed, you can wash your equipment with warm water and soap at the sinks.

  5. Rinse the equipment with deionized water as the final rinse. This will remove the chemicals found in our hard water. 

  6. Dry the glassware and store it in your lockers.

In order to clean your workplace and keep it organized, here is a quick step-by-step process you can follow. Remember, it is extremely important to keep your workplace clean. An acid and water look similar, but the acid is corrosive and will cause chemical burns! 

  1. If there are hazardous chemical spills on your workspace, contact your instructor or lab technician before proceeding. They will help you clean up the area and ensure the chemical gets disposed of appropriately.

  2. Once your area is free of hazardous chemicals, you can use water to wipe your area clean. Use soap for oil spills. Do not wipe the tables with an abrasive material (like sponges). Doing so will damage the countertops.

  3. Pay attention to the hot plate. If safe to do so, scrub using a sponge and warm water to remove burnt residue. DO NOT attempt to clean the hot plates when they are still hot.

  4. Return any equipment where you found them.

  5. If you used the computer in the lab room, make sure it is powered down before you leave. 

The list of equipment in your lockers will also be provided on your contracts. Below you will find a list of the glassware and supplies in your lockers along with some information on their uses. Keep in mind that the accuracy of each glassware varies. For example, a 2 liter graduated cylinder is less accurate than a 10 mL graduated cylinder.

A glass vessel in the form of a cylinder with a flat bottom and a spout that is used to contain substances. They can be used as reaction vessels since they are relatively inert and have the benefit of being transparent. This allows you to observe reactions. Be careful when using beakers to heat reagents; you cannot tell visually if glass is hot so take care not to touch heated glass vessels with your hands. Instead, use beaker tongs.

Beakers come in a variety of sizes and often have gradations, or lines that help you estimate the volume of the reagents in your beaker. They are not reliable for accurate volume measurements. 

Picture of glass beakers

A glass vessel in the form of a cone with a flat bottom that is used to contain substances. They can be used as reaction vessels since they are relatively inert and have the benefit of being transparent. This allows you to observe  reactions. Be careful when using flasks to heat reagents; you cannot tell visually if glass is hot so take care not to touch heated glass vessels with your hands. Instead, use beaker tongs.

Erlenmeyer flasks come in a variety of sizes and often have gradations, or lines that help you estimate the volume of the reagents in your flask. They are not reliable for accurate volume measurements.

Unlike beakers, the conical shape of flasks allows you to swirl the contents with little risk of spillage; spills can still occur so don't swirl too vigorously! The small opening also allows for filtration set ups.  

Picture of a 125 mL and 50 mL Erlenmeyer flask

A glass vessel in the shape of a long, thin cylinder with a flat base that is used to measure volume. They have gradations, or lines to help you estimate the volume of the reagent in them. Unlike beakers and flasks, graduated cylinders provide more accurate volume measurements. Volumetric flasks and pipets (which are not available to you unless borrowed from the stockroom) are even more accurate and much better suited for volumetric analysis.

Unlike beakers and flasks, the graduated cylinder should not be used as a reaction vessel or for heating reagents. Heating could distort the glass and make the calibrated gradations less accurate.

Picture of a 10 mL graduated cylinder

A glass vessel in the form of a tube with a small opening and a curved bottom. Test tubes normally do not have gradations and are often used as reaction vessels for small volumes of reagents. Since test tubes have a round bottom, they need to be stored in a test tube rack to keep them secure and prevent them from tipping over. 

Test tubes can be heated over a flame. If you are asked to do so in the lab, use a test tube holder to prevent your hands from getting burned. 

Picture of test tubes, test tube holder, and rack

A thin glass stirring tool in the form of a rod. Since they are thin, they are much more susceptible to breaking and should be used with care. 

Picture of a glass stir rod

A plastic, disposable pipet not to be confused with a volumetric pipet. These have bulbs of varying sizes with a long, thin stem. Beral pipets can be used to draw up liquids and to dispense stored liquids. Some have gradations to help you measure volume, but these gradations should not be used for volumetric analysis. 

Picture of plastic beral pipets

These are dyed pieces of paper that changes color at certain pH values. Litmus paper can be used to test for acids or bases, depending on the type you are using. Red litmus paper will turn blue in the presence of a base. Blue litmus paper will turn red in the presence of an acid.

Picture of plastic vials containing red and blue litmus paper

A small, stainless steel spatula often used for transferring solids or scraping. They can also be use for other purposes such as lifting up filter paper from a Büchner funnel. 

Picture of a small spatula

A shallow, circular piece of glass. It has a concave structure and can be used as a vessel to hold reagents or evaporate liquids. Watch glasses can also be used as a cover for beakers when heating up reagents.   

Picture of a glass watch glass

Plastic, disposable, shallow dishes used to weigh and transfer reagents. They are needed to prevent damaging balances. 

Picture of a plastic, disposable weigh boat

Thin object marked with metric and/or imperial units used to measure distance. You will be provided a six inch ruler (a little bit above fifteen centimeters). Meter sticks are available in the Chemistry Stockroom if you need to measure something exceeding six inches.

Picture of a six inch plastic ruler

Hot Plates

Hot plates are portable devices with a flat, heatable surface.  These allow you to adjust the temperature using a knob. Some even allow you to use a stirring function (a magnetic bar is needed). 

Heating Mantles

Heating mantles are insulated devices that provide an alternate form of heating, typically for round bottom flasks. They distribute heat much more evenly giving you more control.

Bunsen Burners

A tool that creates an open gas flame. These typically can be used to heat contents in a test tube. Take care not to burn yourself when using bunsen burners. 

Ovens

These are often used to dry out substances at a set temperature. They can also be used to quickly dry glassware that isn't the volumetric type.

Ring Stands

A long metal rod held upright on a heavy base. These are used as a sturdy support for your setups which typically include filtration, distillation, and titration setups. A variety of clamps will help keep equipment secure.

Accessories

We have a variety of tools that can be used in conjunction with rings stands. We have buret clamps, universal clamps, adapter clamps, temperature probe clamps, and support rings.

Electronic Balance

These balances are available in every lab room and are used to weigh objects. If more accuracy is desired, analytical balances are available in the instrument room. Keep in mind that not all experiments require such accuracy though.

Triple Beam Balance

A balance with, you guessed it, three beams that allow you to accurately weigh out objects. The beams have adjustable masses that you can move. The triple beam balance can be used if the object's mass exceeds the measuring capabilities of the electronic balances. Our triple beam balances can measure masses up to 2,610 grams by attaching countermasses. 

Vacuum Flask/Titration Flask

A glass, conical vessel with a short glass tube that can be connected to a vacuum. These are used for filtration purposes and should be used with a Büchner funnel and filter paper.

BURETS

A long, thin tube of glass with a stopcock attached to one end. It is similar to a graduated cylinder but is used to accurately dispense liquids (as opposed to accurately containing liquids) with much more control thanks to the stopcock. These are typically used in titration experiments. 

Graduated Pipets

A long, thin tube of glass with both ends open. Graduated pipets require an external bulb of sorts attached to one end to create a vacuum. Unlike graduated cylinders, these are meant to accurately dispense liquids.

Volumetric Pipets

A long, thin tube of glass calibrated to accurately dispense a specified amount of liquid; you will need a specific type for whatever volume of liquid you need to dispense. These are more accurate than graduated pipets, but they also require an external bulb.

Volumetric Flasks

A glass vessel featuring a thin stem, a circular base, and a flat bottom. Volumetric flasks are calibrated to accurately contain a specified amount of liquid; you will need a specific type for whatever volume of liquid you need to contain. They are more accurate than graduated cylinders.

Pasteur Pipet

A glass pipet with a thin stem that requires an external bulb of sorts attached to the larger end to create a vacuum. They are similar to plastic pipets but can be used for organic solvents. Unfortunately, they are very susceptible to breaking. Please use these with caution. They are not meant to be used for volume measurements.

SEPARATORY FUNNELS

A conical, yet spherical, piece of glassware with a stopcock on one end and a removable stopper on the other end. These can be used for liquid-liquid extractions.

Distillation Glassware

An assortment of specialized glassware that can be connected to distill liquid mixtures, or separate based on different boiling points. Included are round bottom flasks, thermometer adapters, condensers, and other accessories.

Glass Tubing

Tubes of glass (fragile) that can be used for gas collection experiments among other things.

 
High-Performance Liquid Chromatography (HPLC) instrument

A complex instrument that is used to separate and analyze liquid mixtures based on their chemical and physical properties. 

Gas Chromatography (GC) instrument

A complex instrument that is used to separate and analyze mixtures based on their chemical and physical properties, assuming that the mixture tested does not decompose when vaporized. It operates similarly to the HPLC instrument with some key differences, notably the gaseous state of the sample. 

Nuclear Magnetic Resonance (NMR) spectrometer

An instrument that uses a form of spectroscopy starring magnetic fields and radio waves. This can be used to analyze and identify samples.

Fourier Transform Infrared (FTIR) spectrometer

An instrument that uses a form of spectroscopy to obtain the infrared spectrum of samples for analysis.

UV-VIS Spectrophotometers

An instrument that uses a form of spectroscopy to obtain the ultra-violet and visible spectrum of samples for analysis.

Rotary Evaporator

This device is essentially a glorified distillation apparatus that operates under a vacuum with a rotating round bottom flask immersed in a hot water bath. Useful for sensitive chemical mixtures that cannot stand excessive heating or samples with high boiling points. 

Schlenk Line

A collection of equipment set up to perform reactions in an inert atmosphere.  


Who To Contact

Location

  • S - Willard Lewallen STEM Center

    S - Willard Lewallen STEM Center

    Location Type: Building

    Building Name: S - Willard Lewallen STEM Center

    Room Location: S-206